Zoom Conferencing

Overview

Zoom is a high-quality video and audio online conferencing tool for desktops, tablets and smartphones.

Zoom Meetings are ideal for online classes, meetings, special events, webinars, distance learning, group work, breakout rooms, collaboration, research supervision and collaboration, mentoring and even job interviews.

You can access UNSW Zoom via SSO by clicking here and entering your zID and password.

Do you have a question about Zoom? Some common questions are answered below in our Self help Guides and Zoom Security Best Practice Guide.

You can also follow this link to search for articles on virtually any aspect of Zoom.

What's new

For the purposes of UNSW Zoom data management and retention, two types of recordings have been identified: 

  1. Academic: Pre-recorded course content, lectures, and tutorials. Assessable material (presentations and student content recorded for the purpose of assessment). 

Due to the large file size for storing video, academic recordings should only be retained according to business needs – until no longer required. Users will be responsible for classifying the content of their recordings and unless part of a student’s academic record, all recordings that feature student interactions should be deleted as soon as no longer required. If a user has a matching profile in Zoom and Echo360, all Zoom cloud recordings will be automatically uploaded into their Echo360 library. This applies to all users who have an instructor profile in Moodle, as they will also have an Echo360 profile that matches Zoom. If a user does not have a matching Echo360 profile, they will be responsible for manually moving any recordings they are required to keep from Zoom cloud storage to a provided UNSW storage option – MS OneDrive is recommended. Data will automatically be retained in Zoom cloud storage for 180 days, after 180 days all recordings stored in Zoom cloud storage will be moved to trash where they can be retrieved for 30 days. After 30 days they will be deleted permanently.   

  1. Non-Academic: Meetings and other non-academic activities.  

Non-academic recordings need to be classified by the owner according to UNSW’s Data Classification Standard and careful consideration must be made prior to recording as to whether the recording is even necessary. As with academic recordings, it is recommended that users move any necessary data from Zoom cloud storage to a provided UNSW storage option – MS OneDrive is recommended. Data will automatically be retained in Zoom cloud storage for 180 days, after 180 days all recordings stored in Zoom cloud storage will be moved to trash where they can be retrieved for 30 days. After 30 days they will be deleted permanently.  

UNSW Zoom cloud storage is intended for temporary storage only, not long-term storage. For long term storage approved UNSW storage options should be utilised. For more information please see the Recordings section below, under Self Help Guides.

How to sign in via the Zoom Application


Sign in via Single Sign On (SSO)

zoom app signin 1


zoom app signin 2


zoom app signin 3


If you are logged in to other UNSW SSO enabled services, you should be automatically logged in. If not, you will be asked to sign in with your zID@ad.unsw.edu.au and zPass.

If you experience any issues log a ticket with the IT Service Centre.


IMPORTANT NOTE:

Signing in via SSO means that your Zoom account will be linked only to you and cannot be shared. If it is critical for multiple individuals to access the same account, please raise a ticket to the AV Team to discuss your options.

Alternatively, you can check if Zoom Scheduling Privilege will apply to your business need.

You must utilise one of the following settings when hosting a UNSW Zoom meeting: meeting passcode, waiting room or “only authenticated users can join”.


Zoom - 1 of 3 security settings


If you do not utilise one of these security methods when setting up your UNSW Zoom meeting, your meeting will default to have the waiting room enabled. See the Zoom security best practice guide for more information on how to best secure your meetings.

Zoom Security Best Practice Guide

This UNSW Zoom Security Best Practice Guide has been developed to keep your UNSW Zoom meetings safe and secure.  If you have any further questions please see the Zoom frequently asked questions page in the first instance, or contact UNSW Multimedia and AV team.
See UNSW Cyber Security tips.

Remember that it is your responsibility to ensure that you are complying with UNSW rules and guidelines when using the UNSW Zoom service

Always sign into the UNSW Zoom service using the Single Sign On (SSO) method and using your UNSW zID and zPass

1. Launch the Zoom application

2. Click Sign in

zoom app signin 1

3. Click SSO

zoom app signin 2

4. If prompted add "unsw" in the company domain field and click "Continue"

zoom app signin 3

5. Enter your UNSW zID in the format zID@ad.unsw.edu.au

UNSW Azure AD login page

6. Click Open Zoom Meetings

zoom app signin 5

UNSW Zoom accounts default so that only the meeting host can record the Zoom meeting.  However, if required, the host can also assign an attendee the ability to record the meeting locally


How to assign the ability to record a meeting locally to an attendee:

1. In the participants menu, navigate to the participant who will be granted recording privlidges and click More next to their name.

Zoom assign recording privlidge

We recommend that you limit the use of Zoom meeting recording where possible, and only ever assign known authorised end users the ability to record your meeting.

It is your responsibility to ensure that meeting recording is carried out in accordance with university privacy and data handling guidelines.  You should read the UNSW Privacy and Security Guide before recording any meetings.  

It is also your responsibility to ensure that your use of UNSW supplied software is in line with UNSW acceptable use of UNSW ICT Resources policy.

Zoom has also published a guide for securing your meetings with helpful tips to make your meeting more secure, such as requiring a passcode, using the waiting room or using the “only authenticated users can join” function, and then locking your meeting once all attendees are present.

See UNSW Cyber Security tips

Always ensure that you only share your meeting recording with known meeting participants.

 
Always check that recipients/attendees are known and are authorised to view the meeting before distributing your recording.


Never publicly share your meeting invite details via social media. This will help to avoid rogue attendees joining you meeting and accessing meeting data.


How to view a list of meeting participants:

1. Click Participants in the host controls to display the participants list.

Zoom recording share

2. (Optional) Click the drop-down menu located at the top left corner and click Pop Out to separate the participants list from the meeting window

Zoom share participants


We recommend utilising the waiting room and the “only authenticated users can join” security settings.  You should only ever admit known attendees to your meeting.

Hosts must always utilise at least one of the following security methods; passcode protection, the waiting room function, or the “only authenticated users can connect” option for meetings.  If none of the above security settings are selected, UNSW Zoom meetings will default to have the waiting room function enabled.  

Hosts should always passcode protect Zoom meetings in which sensitive data will be discussed or shared.  Meetings that involve sensitive information, or in which sensitive data is shared, should not be recorded.

Never utilise personally identifying information in the title of your Zoom meetingClick here for more information about the UNSW Data Classification Standard.

Unauthenticated users should be held in a waiting room so the organiser can check their identity upon admitting them to the call.


This is especially important where an attendee is dialling from a phone number and no email id/name is displayed to identify the user.  The meeting host should always monitor the participants list and ensure that no unknown participants join.


How to enable the waiting room, passcode or "only authenticated users can join" option:

1. Choose "Schedule" within your desktop zoom client

Zoom app schedule meeting screen

2. Under the security options select at least one of the three security options.

Zoom security setting

Important note: to effectively secure a meeting using the "Passcode" option, the host must use an automatically generated meeting ID and supply only this and the passcode as the means to join.

Zoom meeting ID

You should know and understand your obligations regarding privacy and data security before utilising any video conferencing platforms.  The Working from Home Privacy and Data Security Guide is a useful reference as a starting point.

Consider utilising Microsoft Teams for enhanced security, especially meetings that involve sensitive information, or in which sensitive data will be shared.

Cloud based Zoom recordings are encrypted.  However, if you choose to record your Zoom meeting to your local device then the recording is not automatically encrypted.  

To encrypt future locally saved recordings, select end-to-end encryption within the meeting settings when recording sensitive meetings.

Please also note that a minimum Zoom client version of 5.5.0 is required by all participants to support features in end-to-end encryption.

Please be aware that Zoom end-to-end encryption is still in development.   Therefore, selecting end-to-end encryption in Zoom will disable several features.  For more information see the Zoom documentation here: https://support.zoom.us/hc/en-us/articles/360048660871.


How to use end to end encryption for your Zoom meeting:

1. Select schedule a meeting

Zoom app schedule meeting screen

2. Select end to end encryption and save

Zoom encryption setting

Zoom screen sharing capability is a useful tool but also presents a risk.  Be aware that it is easy to accidentally disclose sensitive information by using this feature.  Always be careful to only share information that is meant for your Zoom meeting attendees.  

Please note that for security reasons file sharing has been disabled for participants on UNSW Zoom meetings.  Only the meeting host or hosts can share their screen.

See UNSW Cyber Security tips

UNSW IT enforces a minimum acceptable Zoom application version for UNSW Zoom users.

To ensure cyber security compliance at UNSW, you may be prompted to update the Zoom application on your device when logging in via UNSW SSO prior to commencing your Zoom meeting.

Always utilise the “check for updates” feature within the Zoom application if you need to check the latest version of the application.


How to check your Zoom version or for Zoom updates:

1. Click you profile logo on the top right in the desktop Zoom application

Zoom profile image click


2. Select check for updates

Zoom app updates

3. The Zoom application version will be shown

Zoom App updating

4. Zoom will automatically download the latest version of the Zoom application if there is one available


You should never share your UNSW Zoom credentials with another person or use a shared mailbox to set up and UNSW Zoom account.

Instead of sharing your credentials, you should use the Zoom scheduling privilege function. The delegate who has been assigned scheduling privilege is able to schedule, manage and act as an alternative host for your meetings.  Note that, the delegate and the main account holder must have a licensed UNSW Zoom account to use scheduling privilege.

If both account holders have a webinar license, then delegate will also be able schedule webinars on behalf of the main account holder.


How to assign scheduling privileges in Zoom:

1. Log in to the UNSW Zoom web portal to see your advanced meeting click "Settings" and then click "Other"

Zoom web portal shared accounts setting location

2. click the + next to "Assign scheduling privilege to"

Zoom schedule meeting assignee

3. Type in the email address of the account holder(s) that you want to assign scheduling privilege to. Use commas to separate multiple email addresses.

Note:  If scheduling privilege cannot be assigned because the user does not have a licensed UNSW Zoom account you will receive an error message: "Can't find user [their email]"

4. Click Assign


How to schedule a meeting for someone else:

1. Once an UNSW Zoom account holder has given you scheduling privileges, logout of the Zoom application and login again to activate your scheduling privilege

2. Click on the Schedule icon

Zoom app schedule meeting screen

3. Choose the user you want to schedule for from the "Schedule for" drop down menu

Zoom app schedule meeting screen

4. Click save

5. This will generate a meeting invite from your email application including the Zoom meeting link.  Enter any additional details into the meeting invite as required and send it out to the intended recipients.  Note, always retain the Zoom meeting link in your invite.

6. Recipients will receive the invite from the delegate’s email address.  The Zoom meeting will be hosted from the main account holder’s Zoom account.

Self Help Guides

Students will be able to log in to Zoom via Single Sign On (SSO) using your zID and zPass at UNSW Zoom Video Conferencing or via the Zoom application.


What can I do with the UNSW Zoom student account?

  • Join meetings and teaching sessions hosted from licensed accounts
  • Securely authenticate via single sign on with your UNSW identity when joining meetings and teaching sessions
  • Host meetings with up to 300 participants (30-hour time limit per meeting)


What can't I do with the UNSW Zoom student account?

  • Recordings are not supported by a basic student account
  • No Personal Meeting ID is available
  • No Live streaming of meetings is possible


All meetings hosted from student accounts must be secured with one security option. See Locking and Passcode protecting meetings in the Best Practice Guides above for more information.

 Always sign into the UNSW Zoom service using the Single Sign On (SSO) method and using your UNSW zID and zPass

 You can sign into the web portal via https://unsw.zoom.us/ or you can sign in via the Zoom application.

1. Launch the Zoom application

2. Click Sign in

zoom app signin 1

3. Click SSO

zoom app signin 2

4. If prompted add "unsw" in the company domain field and click "Continue"

zoom app signin 3

5. Enter your UNSW zID in the format zID@ad.unsw.edu.au

UNSW Azure AD login page

6. Click Open Zoom Meetings

zoom app signin 5

Zoom Meetings can run on either your computer (PC or Mac) and Mobile device (Tablet or smartphone) using Apple IOS or Android OS.

You will need to download the Zoom application on a computer or laptop or Zoom Meeting app on a mobile device.

To setup a Zoom Meeting on your computer or Mobile device:

  1. Download Zoom application for Meetings for your computer

  2. Or for mobile devices, download Zoom Mobile App for:

    • AppStore for iPhone 

    • PlayStore for Android 

If you already have an invitation link to the meeting, just use the link.

To join a session/meeting from your Zoom Meeting client directly:

1. Start the Zoom Client on your device

2. Click on ‘Join a Meeting’

image004

3, Enter your scheduled meeting ID to start the meeting.  Note: The meeting ID is the 9digit number at the end of the URL link

4. If the meeting is open or in progress, you will see the following:

image008

5. Select “Join Audio Conference by Computer”

You can test your microphone and speakers by selecting “Test Computer Mic & Speakers”.

6. If you do not have microphone or having trouble with your computer audio, you can also dial in.

  • Select “Phone Call” Tab to get the details

  • Use your mobile or landline to dial into a phone conference call to participate

    • In Australia +61 (0) 2 8015 2088

  • When prompted, use Meeting ID from the meeting invite, which is listed in the meeting invitation. Note: The Meeting ID is also the last 9 digits of the link used to join the Zoom Meeting

When you are in the meeting, you can reveal the controls by hovering the mouse over the lower edge or select “ALT”.

image014

Your audio should be on mute and your video stopped by defaulted on when you join the meeting.
1. Audio – During the meeting you can turn on and off your audio

  • In the lower left is the Audio control, where you can click to Unmute or Mute your audio:

image015 image016

Note: You should leave your microphone on mute unless you are talking

2. Video – During the meeting you can turn on and off your video

  • In the lower left is the Video control, which you can click to stop or start the video:

image018 image020

What can you do once in the meeting, includes:

image022

1. Participants – You can list all the Participants in the meeting

  • Start by clicking on Chat:

image023

  • See Participants list on the right

  • Options you have at the bottom is:

image027

  • Select Unmute Me to turn on your microphone

  • Select Raise Hand to turn get attention of the Host

Note: Select Lower Hand if you no longer need attention of the Host


2. Chat – You can chat (type into a chat area)

  • Start by clicking on Chat:

image032

  • See Chat box on the right

image034

  • By default, the chat will be to “Everyone” in the meeting by typing in text:

         i. Typing in text and then enter:

image036

        ii. Then see what you typed at top of the chat box:

image038

  • You can also choose to have a private chat with the Host or anyone else in the meeting

         i. By selecting from dropdown of list of all participants

         ii. Select “Everyone” to chat to everyone (all participants)

         iii. Select an individual from dropdown to chat privately with the Host or another Participant

image043

3. Share Screen to share any App screen running or your desktop/home screen with others in the meeting:

  • Click on Share Screen when the Host has enabled you to share or made you the Host of the meeting:

image044

  • Select an application to share:

image046

  • Select “Share Screen” to share

image048

  • To end screen share, move mouse to top of screen and select “Stop Share”:

image050

4. Leave Meeting when you are done with meeting and :

image053

  • Select “Leave Meeting”

image054

  • You have now left the meeting

The recording function is only available for UNSW staff Zoom accounts.  Students do not have access to record from their UNSW Zoom account.

Zoom recordings can only be enabled by the host who has 2 options, Cloud and local PC. Local recordings are not encrypted by default, the user is required to provide encryption if required for sensitive material.

Cloud recordings are encrypted AND copied directly to the Hosts Echo360 library ready to upload to Moodle or other platforms.

  • How much room do my recordings take up? Approximately 200MB per hour for video and 20MB per hour for screen sharing. 

  • Where can I save my data/recordings? See provided UNSW storage options – MS OneDrive is recommended. 

  • How do I record locally? See Zoom recording guide.  

  • Are my recordings already copied into Echo360/Moodle? If you are an instructor in Moodle/Echo, yes. 

  • Will they be deleted from Echo360/Moodle? No, the copied files are not deleted. 

  • I didn’t move my files out of the trash and they were deleted - How do I retrieve my recordings after they’ve been deleted? They are deleted permanently.  

Never include the host participants' names, email or other personally identifiable data on the meeting subject line.

Never post meeting links on social media platforms.

Cloud recordings will expire after 180 days and be moved to trash. Users will have 30 days to recover files from trash before they are permanently deleted.

To recover files from trash;

1. Sign in to the Zoom web portal

2. In the navigation menu, click Recordings. 

Zoom Record Menu
Zoom Record Menu

3. Here you will see a list of recordings, and they days remaining until they expire. If there  
are any cloud recordings in the trash, you will see a Trash icon  at the top right. Click the icon to see any deleted cloud recordings within the past 30 days.  

Zoom Record Library

4. Click Recover on the right to retrieve the recording. 

Zoom Record Trash

5. Click Recover again to confirm. 

6. Your recording will be available again on the Recordings page. 

The following links provide more information on ‘Hybrid Meetings Best Practice Guide’. and UNSW Digital Privacy Policy


Zoom allows guests to easily join meetings. It also allows guest speakers and lecturers to talk to students. For teaching and learning, the guests speakers must have a Zoom account to participate, but they can sign-up for a free Zoom account if they are not UNSW staff or students.

Video transcripts and captions can be a great resource to enhance learning and bring teams together. They support individuals with hearing impairments, non-native English speakers and those that are slower with the processing of information (such as people with learning difficulties, neurodiversity and other conditions).

To support equity and accessibility, it is important that hosts of webinars, meetings and live events always ensure that live transcripts are available for attendees.  

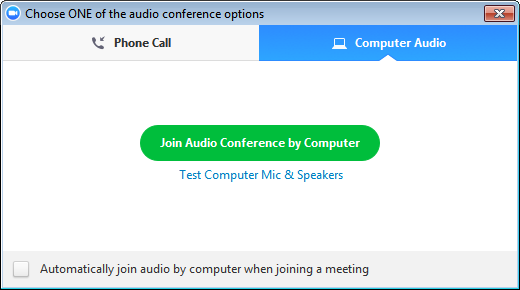
A free live transcript service is available for Microsoft Teams and Zoom webinars, meetings, and live events.   

For Zoom, the host of the webinar must always enable the live transcript function first so that it is available for attendees to turn on.

View instructions for activating video transcripts and captions for Teams and Zoom.


Zoom third party captioning services

As an alternative to the free Zoom live transcript service, a paid closed captioning service can be managed by third party software or manually.

Third party captioning services should be paid for by the Zoom account holder.
The following link provides step by step guides for third party closed captioning

More information can be found at Zoom Closed Captioning support page


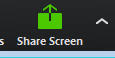
1.Start the meeting or Webinar first

2. click Closed Captions

Location of closed captioing button

3. Choose the Live Transcript option

zoom closed cationing enable


Enable Auto-Transcription: Allows the system to start providing live transcription. Participants will be notified that this service is available.


Using closed captioning in breakout rooms

If you're the meeting host, we recommend using a third-party closed captioning service if you want closed captions in breakout rooms enabled via API token.

If you want a participant to type closed captions, make sure you assign them permission to type closed caption before starting the breakout room sessions:

enable closed captioning on mobile device

After you start breakout room sessions, participants can click Closed Caption in the meeting controls to view closed captions.

Notes:

    Only one participant can be assigned to type closed captions in a meeting, thus it is only possible to have one breakout session with closed captioning.
    Live transcription is currently not supported in breakout rooms.

Live transcript limitations

The accuracy of Zoom's live transcription feature depends on many variables, such as but not limited to:

    Background noise
    Volume and clarity of the speaker's voice
    Speaker's proficiency with the English language
    Lexicons and dialects specific to a geography or community

Because of these limitations, if you are required to use speech-to-text support for any compliance needs in your meetings and webinars, Zoom recommend using a third part provider who may be able to guarantee a specific accuracy via API token

The desktop client can be manually updated and best practice is to check you have the current version in advance of your meeting. The web app will always be current.

Log into the client and on the top right click on your profile icon the select "Check for Updates" towards the bottom of the drop down list.

Zoom desktop client update process

If updates are available follow the prompts, this will only take 1-2minutes.

Zoom desktop client upgrading

This UNSW guide has been developed to keep your UNSW Zoom recordings to a manageable size. If you have any further questions please see the Zoom frequently asked questions page in the first instance, or contact UNSW Multimedia and AV team.

Monitor resolution determines the file size of your Zoom recording, the higher the resolution the larger the recorded file size. There will be some instances where a higher resolution is required but for most Zoom meetings and classes a lower resolution will be enough.

The main reasons file sizes should be kept small are:
1.    Reduces storage space on PC if Local recordings is selected
2.    Cloud recordings greater than 5Gb will not be auto loaded to your Echo360 library and requires manual uploading
3.    Some users may encounter difficulties in downloading larger files
4.    Editing of larger files is more time consuming

Reduce the resolution of your display before you start the session and begin recording.

Note: Lowering screen resolution makes text and objects larger in the recording. Make a test recording to see if important content fits comfortably in the viewable area.


Lowering Screen resolution on Windows 10

1.    Click the start menu then select Settings OR click the magnifying glass and type in Settings
2.    Select system then Display

win10 resolution change system settings
win10 resolution change system display settings

3. Scroll down to display resolution and select 1440 x 900

win10 resolution change display settings select resolution

4.    Close the settings window, then start or record your Zoom session with your new selection


Lowering Screen Resolution on a Mac

1.    From the Apple menu, select System Preferences

Mac system preferences

2.    Select Displays then the Display tab

Mac system preferences display
Mac system preferences display scaled large text

3.    Next to Resolution, select Scaled.
4.    Choose a setting that results in larger text

Mac system preferences display scaled large text

5.    Close System Preferences, then start or record your Zoom session with your new selection.


If you need assistance to sign in via SSO, or need any additional information, please contact the UNSW Multimedia and AV team.

Further Reading and Helpful Links


UNSW Zoom access portal

UNSW Zoom Video Conferencing


Zoom Help Centre

Zoom Help Center


Adding the Zoom Outlook Add-in makes setting and calendarising UNSW Zoom meetings much easier.  


1. In Outlook, click Home > Get Add-ins on the ribbon.

Get Zoom Outlook Add On

 2. On the Add-Ins for Outlook page, type Zoom in the Search box, select Zoom for Outlook and click Add.

3- Addons for Outlook
4 - Zoom for Outlook

3. In Outlook, switch to calendar view and click Home > New Meeting on the ribbon. You should now see two new Zoom icons in the ribbon, "Add a Zoom Meeting" and "Settings".  If not, restart your Outlook application.

5 - Zoom Outlook Add On Icons

4. Click "Add a Zoom Meeting" to add Zoom join details to the meeting. If prompted, sign in with SSO.

Sign in to Outlook Addon via SSO

5. Type unsw as the domain name, then if prompted, enter your zID and password.

Zoom SSO add domain

6. In the "Required" field add your desired participants. You can also invite a Teams meeting room and join the meeting using the Teams meeting room touch panel and use the in room conferencing system. Click Send to send your meeting invitation.

Include Teams room in Invite

See the guide below for more information on how to invite and use a UNSW Teams meeting room for your Zoom meeting.

Please contact the Multimedia and AV Technologies team at av@unsw.edu.au or 9385 4888 for assistance or to book a training session.

Staff can now invite a UNSW Teams meeting room to their UNSW Zoom meetings. 

This can be done from the Zoom applicaation itself, or from within Outlook once the Zoom Outlook Add-in is installed. 

See this guide for how to install the Outlook Add-in.


Scheduling a meeting from Outlook

1. Ensure you have the Zoom Add-in for Outlook installed. See here to find out how. 

2. In Outlook, switch to calendar view and click "Home" and then "New Meeting" on the ribbon. You should now see two new Zoom icons in the ribbon -  "Add a Zoom Meeting" and "Settings" as shown below.

5 - Zoom Outlook Add On Icons

3. Click Settings. The Zoom sidebar will open. Select your desired video, audio, security, and other meeting settings.

Important:

Please only use the "passcode" security option if you are inviting a Teams room.  The other security option selections may impact Teams room Zoom functionality.  

Passcode

You must also select "allow participants to join at any time" in the "Advanced Options" section.  Otherwise, the meeting host will need to join the meeting from the Zoom application first to start the meeting. 

Allow participants to join at any time

4. Click "Add Zoom Meeting" to add the Zoom meeting details to the Outlook meeting invite.

Add a Zoom meeting


5. In the "Required" field add your desired participants. This can also include your UNSW Teams meeting room.  Click "Send" to send the meeting invitation.

Include Teams room in Invite

6. Viewing and editing meetings:

  • 6.1 Open the Outlook desktop app and switch to calendar view.
  • 6.2 Double-click a Zoom meeting to display the meeting details.
  • 6.3 Under the Zoom icons in the ribbon, click Settings.
  • 6.4 The Zoom sidebar will open.
  • 6.5 Change your meeting options and click "Update" to apply the changes.

If you have invited a UNSW Teams meeting room to your Zoom meeting, please see the guide below for how to Join and manage your Zoom meeting from the room touch panel.

Please contact the Multimedia and AV Technologies team at av@unsw.edu.au or 9385 4888 for assistance or to book a training session.

If you have scheduled your UNSW Zoom meeting, and have invited a UNSW Teams meeting room, you can join and control your meeting from the Teams meeting room touch panel.

Before you start please see the Inviting a Teams meeting room to a UNSW Zoom meeting guide above.

1. Once you have invited a UNSW Teams meeting room to a UNSW Zoom meeting, the Zoom meeting will appear on the home screen of the Teams meeting room touch panel.  The host's name and the time of the meeting will be displayed.

Teams Room Crestron touch panel

 2.To begin the meeting, click "Join" on the Teams meeting room touch panel.

2 - Join Zoom meeting button_0

The room camera and microphone can now be used for your Zoom meeting.  

The Teams meeting room touch panel will show controls on the bottom bar as shown in the image below.

Teams room Crestron touch panel image after selecting join Zoom meeting

 3. Select the Camera icon to toggle the room camera on/off

Teams room Crestron touch panel Camera Mute Icon


 4. Select the Microphone icon to toggle the microphone on/off

Teams room Crestron touch panel Mic Mute Icon

 5. Select the +/- icons to turn the room volume up or down

Teams room Crestron touch panel Vol level Icon

 6. At the conclusion of your meeting select "Leave" to leave the meeting

Teams meeting room Crestron touch panel leave meeting icon


Advanced Options

7. Select "Show meeting on this device" to replicate the main monitor's content to the touch panel

Teams Room Crestron touch panel show meeting on this device icon


The touch panel will replicate the main monitor, allowing for additional functionality.  This selection enables touch functionality without a touch enabled main monitor


8. The local camera will be displayed on the top area of the screen as default (Speaker View) 
 
The online participant(s) will be displayed on the main area of the screen

Crestron Teams speaker view default

Speaker View (default)

9. Select "View" to toggle between "Speaker View" and "Gallery View"

Teams room Crestron touch panel toggle speaker and gallery view

10. In Gallery View, the local camera and all participants will be evenly distributed in a grid

Crestron Teams gallery view default

Gallery View
 

11. Select "Participants" to display the participants on the right-hand pane

Crestron Teams participants view image

12. Select "Chat" to display the active chat window on the right-hand pane.  

Crestron Teams chat view

Touch the "Type message here" section to type a message directly from the touch panel

Crestron Teams chat 2 view

13. Select "Reactions" to raise your hand or select other reactions

Crestron Teams Reactions

Please contact the Multimedia and AV Technologies team at av@unsw.edu.au or 9385 4888 for assistance or to book a training session.

  1. Identify the "Meeting ID" and password in the Zoom calendar invitation and keep it on hand.

    It will most likely look like this:
    Zoom meeting ID
  2. Tap "New Meeting" on the touch panel in the meeting room
     
  3. Then tap the blue "enter URL" button
     
  4. Enter the following URL: meeting ID @lync.zoom.us   eg. 107195110@lync.zoom.us
     
  5. Tap the blue "invite" button to complete the call

PLEASE NOTE: The meeting organiser will need to select passcode as the Zoom meeting security setting, selecting "Waiting Room" or "Authenticated Users" will mean the Teams room cannot joint.


Troubleshooting Guides

If you are unable to login, please check:

  • If you have the right zID and zPass, please check the How to log into Zoom Conferencing guide above in the self help section.
  • Ensure that you are accessing UNSW Zoom via Single Sign On (SSO) using your zID and zPass at unsw.zoom.us or via the Zoom application on your device.
  • If you continue to have issues please call the IT Service Desk on Ext51333 ot email servicedesk@unsw.edu.au

If you are unable to join a meeting, make sure:

  • The link is valid

  • The meeting is still happening

  • You got the right Room ID

  • You have access to the meeting room

Feedback